Since the appearance of Vista, Microsoft has tried to implement in the operating systems Windows family built anti-virus or something like it. First it was Microsoft AntiSpyware, whose main task was to fight with spyware. In the future, with the development this software has undergone a number of changes, and besides, it was renamed in Windows Defender.
Now Windows Defender — is a special software that monitors the work of certain segments of the operating system for virus activity, emergence of spyware or other malicious content in real-time. Upon detection of suspicious objects, their work is blocked, and the user gets information in a warning message.
It should be noted, despite all the efforts of developers, even on Windows 10, Windows Defender is still not up to the level of operation of good anti-virus and replace it in full. For this reason, users put the third-party antivirus software. Built-in tool must be switched off. This happens, for example, when you install Kaspersky Anti-Virus, DrWeb and others. But, unfortunately, it does not always happen, and two active scanners in the system begin to interfere with each other. In this case, you must manually disable Windows Defender. For this there are two simple ways.
First option — through Windows 10 settings
- In the system tray, near the clock, click on the notification bar icon to open the right-hand panel.
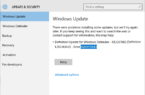
- Click on «All Settings» icon, click «Updates and Security» and then click Windows Defender.
- Disable all functions.
Second option — through Windows Toolbar
- Here it is necessary to select the type of display «Large Icons», and then double-click on the tab Windows Defender.
- Click on the «Settings» icon. In the window it is necessary to disable «Real-time protection» and «Cloud Protection».
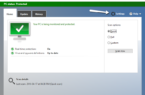
- After that, you will see the message «Real-time protection mode is disabled»
Watch the video to find out how to Disable or Enable Windows Defender in Windows 10.