Immediately after the release of the new operating system, all became interested in How to find your Windows 10 product key, although in most cases it is not required. However, the problem is already acute, and with access to computers and laptops with pre-installed Windows 10, I think it will be even more in demand.
This manual describes the easiest way to learn Windows 10 product key from the command line (or, more correctly, Windows PowerShell), as well as third-party programs. At the same time mention of why the different programs show different data as separate OEM key to look at UEFI (for an OS that was originally on the computer) and the key of the currently installed system.
How to find your Windows 10 product key and OEM-key in ShowKeyPlus?
ShowKeyPlus requires no installation and separate shows at once two keys installed in the current system and the OEM key in UEFI. At the same time reports for which it is the Windows version suitable key from UEFI. Also, with this program you can learn the key from another folder with Windows 10 (on another hard disk, in Windows.old folder).
All you need to do — run the program and view the data displayed:
Installed Key — key of the installed system.
OEM Key — a pre-installed key, if it was on the computer.
Also, these data can be saved to a text file for further use or archiving by clicking «Save». Incidentally, the problem is that different programs sometimes show different product keys for Windows, just comes from the fact that some of them look in its installed system, the other in the UEFI.
Download ShowKeyPlus here — https://github.com/Superfly-Inc/ShowKeyPlus/releases/
How to find your Windows 10 product key and OEM-key in PowerShell?
Where you can do without third-party programs, prefer to do without them. Viewing the product key Windows 10 — one of those tasks. If you find it easier to use the free program to do this, scroll through the guide below.
Simple PowerShell command or the command line to find out the key installed at the moment is not provided (there is such a team, showing the key from the UEFI-, show below. However, it usually requires a key of the current system, which differs from the preset). But you can use ready-made script from PowerShell, which displays the information (Jakob Bindslet script).
This is what is required to do. First of all, start Notepad and copy the code below.
function Get-WindowsKey {
param ($targets = «.»)
$hklm = 2147483650
$regPath = «Software\Microsoft\Windows NT\CurrentVersion»
$regValue = «DigitalProductId»
Foreach ($target in $targets) {
$productKey = $null
$win32os = $null
$wmi = [WMIClass]»\\$target\root\default:stdRegProv»
$data = $wmi.GetBinaryValue($hklm,$regPath,$regValue)
$binArray = ($data.uValue)[52..66]
$charsArray = «B»,»C»,»D»,»F»,»G»,»H»,»J»,»K»,»M»,»P»,»Q»,»R»,»T»,»V»,»W»,»X»,»Y»,»2″,»3″,»4″,»6″,»7″,»8″,»9″
## decrypt base24 encoded binary data
For ($i = 24; $i -ge 0; $i—) {
$k = 0
For ($j = 14; $j -ge 0; $j—) {
$k = $k * 256 -bxor $binArray[$j]
$binArray[$j] = [math]::truncate($k / 24)
$k = $k % 24
}
$productKey = $charsArray[$k] + $productKey
If (($i % 5 -eq 0) -and ($i -ne 0)) {
$productKey = «-» + $productKey
}
}
$win32os = Get-WmiObject Win32_OperatingSystem -computer $target
$obj = New-Object Object
$obj | Add-Member Noteproperty Computer -value $target
$obj | Add-Member Noteproperty Caption -value $win32os.Caption
$obj | Add-Member Noteproperty CSDVersion -value $win32os.CSDVersion
$obj | Add-Member Noteproperty OSArch -value $win32os.OSArchitecture
$obj | Add-Member Noteproperty BuildNumber -value $win32os.BuildNumber
$obj | Add-Member Noteproperty RegisteredTo -value $win32os.RegisteredUser
$obj | Add-Member Noteproperty ProductID -value $win32os.SerialNumber
$obj | Add-Member Noteproperty ProductKey -value $productkey
$obj
}
}
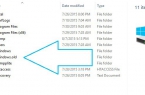
Save the file with the extension .ps1. Do this in a notebook, while retaining in «Save as type» select «All Files» instead «Text Documents.»
After that, run Windows PowerShell as an administrator. To do this, you can start to type PowerShell in the Search box, and then click on the right mouse button and select the appropriate item.
In PowerShell, type the following command: Set-ExecutionPolicy RemoteSigned and confirm by (enter Y, and press Enter when prompted).
The next step, enter the following command: Import-Module C: \ get-win-key.ps1 (this command specifies the path to the saved file with a script).
And the last step — in PowerShell, type Get-WindowsKey and after pressing Enter, you will see information including the Windows 10 Product Key installed on your computer.